2 Pre-course tasks
Note: This is the first time I’ve had participants do some pre-course tasks, so some things may not work or may not make sense. At the end of this assignment there is a survey that has a question about what could be improved and what worked. As you complete the tasks, take notes on what could be improved and what you liked. I’ll use these to make this pre-course assignment better next time! Thanks :)
Complete everything in this pre-course tasks chapter and complete the survey at the end. The deadline for these tasks is 3 days before the course starts (end of day June 18th).
2.1 Installing programs
The very first things to do are to:
- Install the latest version of R (at least version 3.6.0, preferably 4.0.0)
- Install the latest version of RStudio (at least version 1.2.5001, preferably the latest 1.3 version)
- Install Git
For some Windows users, you may need to install Rtools in order for some R packages to be installed (which you’ll do shortly).
All these programs are required for the course, even Git. Git, which is a software program to formally manage file versions, is used because of it’s popularity and the amount of documentation available for it. Check out the online book Happy Git with R, especially the “Why Git” section, for an understanding on why we are teaching Git. Windows users tend to have more trouble with installing Git than macOS or Linux users. See the section on Installing Git for Windows for help.
If you have administrative issues with updating R or RStudio to the latest version, and you have at least 3.6.0 for R and at least 1.2.5001 for RStudio, it should be fine. Unfortunately, work computers may not have Git installed and it is required for the course, so please ask your IT for help if you need administrative permissions to installing it.
Once R, RStudio, and Git have been installed, open RStudio. If you at any point during these pre-course tasks have any troubles, try as best you can to complete the task and then let us know about the issues in the pre-course survey (at the end of this section). If you continue having problems, indicate on the survey that you need help and we can try to book a quick video call to fix the problem. Otherwise, if you can, come to the course earlier (15-20 min) to get help.
2.2 Getting familiar with RStudio
RStudio is an environment to interact with R. R is like an engine, while RStudio is what you use to actually work with the engine. Check out Figure 2.1 below. You can see that RStudio has four “panels”, dividing the screen into the four corners.
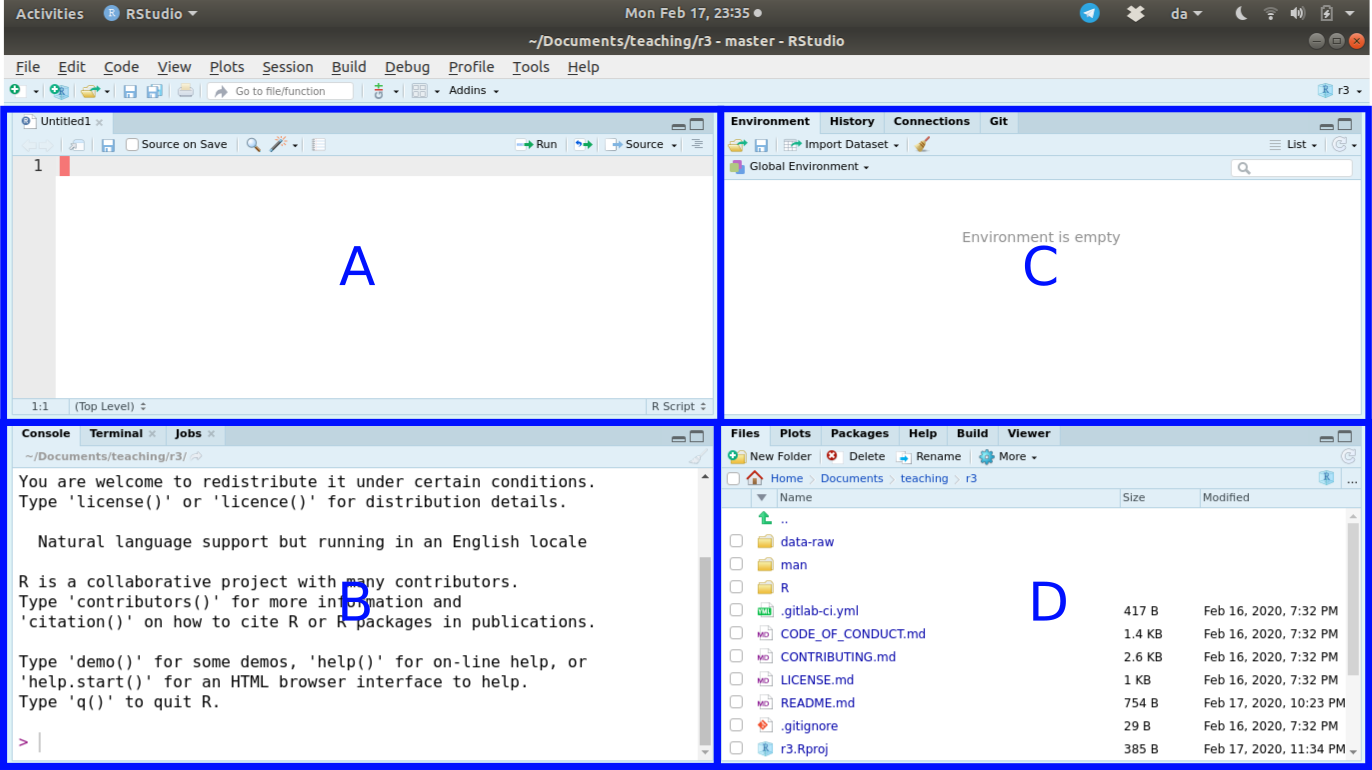
Figure 2.1: Interface to RStudio.
While you can customize where the individual panels go, the default layout is how the panels are shown.
- Panel “A” is the panel that shows the “scripts”, which we will cover in the class. You may or may not see this panel when you open RStudio for the first time. This panel is where your write R code that will be saved as a file.
- Panel “B” is the Console. This is where R commands are sent and evaluated by R. This is the “engine”. No R code written here is saved. Almost all of the tasks below will be entered through the Console.
- Panel “C” contains the Environment, History, Connections, and Git tabs. In this course we’ll only be using the Environment and Git tab, which we’ll cover more later.
- Panel “D” has the Files, Plots, Packages, Help, Build, and Viewer tabs. For the course we’ll only be going over the Files, Plots, Packages, and Help tabs.
2.3 Installing R packages
Now that you have RStudio and R on your computer, we need to install the R packages we’ll use in the course. R packages are external bundles of R code that other people have written. There are so many R packages available that if there is something you’d like to do in R, there probably is an R package to do it. Making use of R packages can seriously help you out when doing your research.
Alright, you’ll need to install the remotes package. See the GIF in Figure 2.2 below for how to do that:
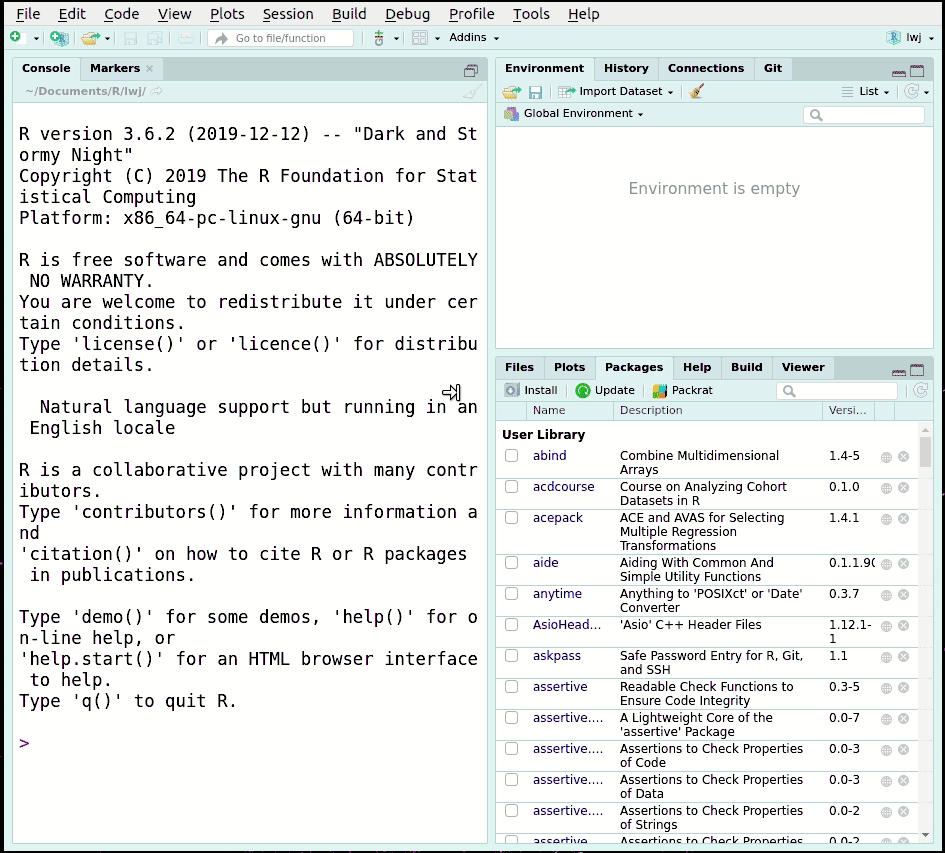
Figure 2.2: Installing the remotes package in RStudio.
Then type in the RStudio Console the commands below. Check out the GIF in Figure 2.3 below for how to do that. Hit enter and the r3 helper package will be installed.
remotes::install_gitlab("rostools/r3", upgrade = TRUE)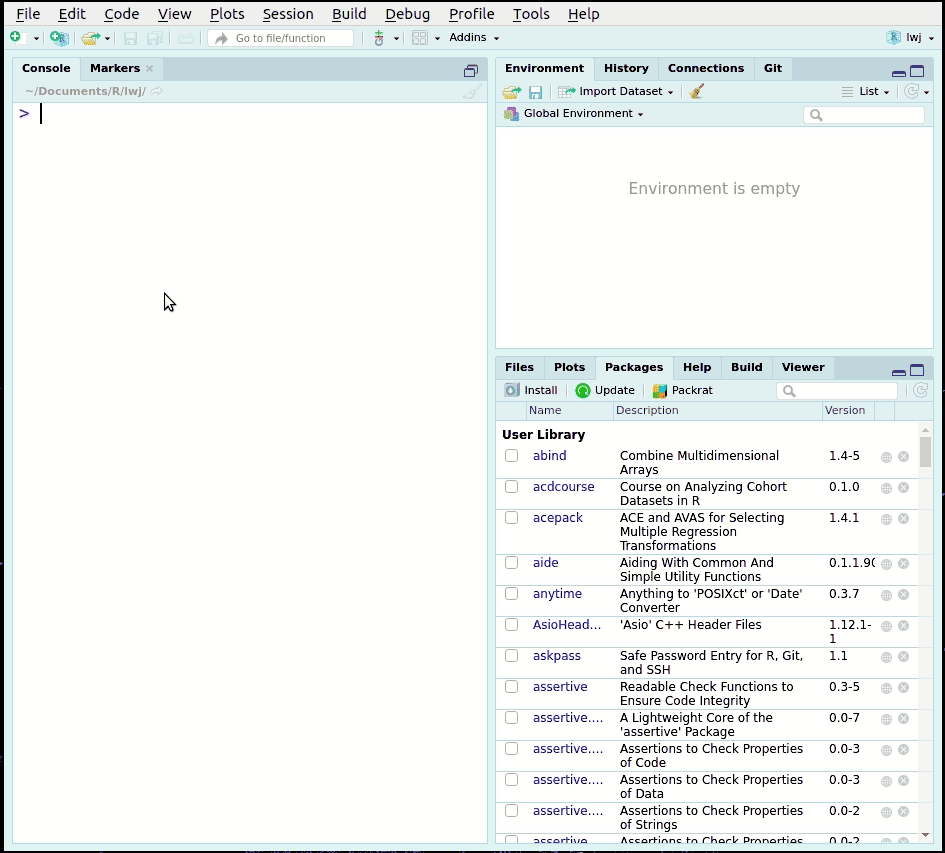
Figure 2.3: Using the RStudio Console to install the r3 helper package.
Note: When you see a command like something::something(),
for example with remotes::install_gitlab(), you would “read” this as:
R, can you please use the install_gitlab function from the remotes package.
The normal way of doing it would be to load the package with library(remotes)
and then run the command.
But by using the ::, we tell R to directly use a function from a package.
We use this trick because we only want to use the install_gitlab() command
from the remotes package and not have to load all the other remotes functions.
We will be using this more as we go along.
2.4 Setting up Git and GitHub
We’ll cover what Git and GitHub are during the course,
but for now we need you to get things ready beforehand so it’s easier in the course.
In order to use Git properly,
we need to inform your computer that you are using Git.
Since we’ve installed the r3 package and
we only want to use specific commands from it,
we’ll be using r3:: often.
So, type in the RStudio Console:
r3::setup_git_config()Hit enter and follow the instructions. Finally, type and run this next command to make sure everything is ok with your set up. When you do the survey, we ask that you copy and paste the output of this command.
r3::check_setup()After you are done, you need to create a GitHub account. See Figure 2.4 for a demonstration of doing that. Make note of your user name, since we’ll ask you for it in the survey.
Note: GitHub is a company and website, while Git is a software. There is sometimes confusion about these two things since they both say “Git”. It’s important to distinguish that they are two separate things.
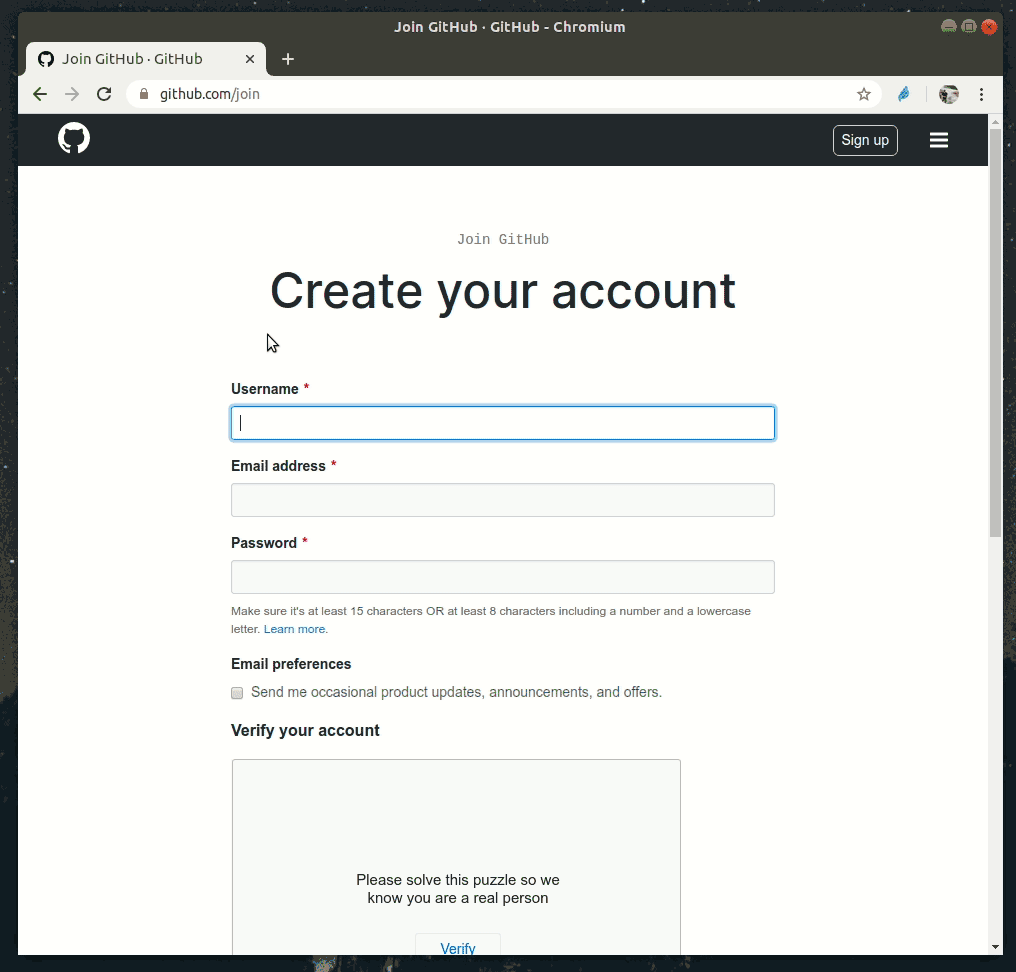
Figure 2.4: Creating a GitHub account.
2.5 Course introduction
Most of the description of the course is found in the syllabus.
For quickly going to the syllabus from RStudio,
run the command r3::open_syllabus().
Or click it from the menu bar on the side.
If you haven’t read it, please read it now.
Read over what the course will cover,
what we expect you to learn at the end of it,
and what our basic assumptions are about who you are and what you know.
At the end of this pre-course assignment we’ll ask you a few questions to see
if you understand what you’ll learn in the course.
One goal of the course is to teach about open science,
and true to our mission, we practice what we preach.
The course material is publicly accessible (all on this website) and
openly licensed so you can use and re-use it for free!
The material is ordered as we will cover it during the course.
Even though the course will include lots of hands-on work during the sessions,
the final group project assignment
will allow you to practice in a team everything you’ve learned.
To quickly access the final project assignment from inside RStudio,
run the command r3::open_assignment().
We have a Code of Conduct. Access it quickly with r3::open_code_of_conduct().
If you haven’t read it, read it now.
At the end there will be a survey that will ask some questions about Conduct.
We want to make sure this course is a supportive and safe environment for learning,
so this Code of Conduct is important.
You’re almost done. Please fill out the pre-course survey to find this assignment, at this link or with this command:
r3::open_pre_survey()See you at the course!